I bought an almost new looking Kel-Tec P-11 at a great local gun store in Chattanooga. They had the gun on consignment, and sold it to me at a very good price, with two magazines. I couldn't find anything wrong with it, and it functioned fine with snap caps. But when I took it to the range to try it out, after about a dozen rounds the trigger pulled all the way back to the grip of the gun, and lost its ability to go forward and reset. A dead trigger!
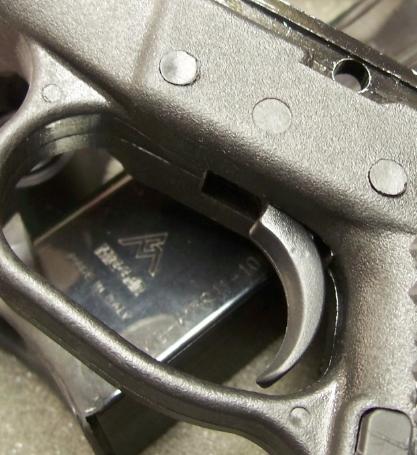
So I field stripped the gun to take a look. I could see that the trigger spring had either broken or come loose, and it was sticking up between the polymer grip and the aluminum inner frame, into the path of the slide.
My range is also at the store where I bought the gun, so I took it to one of the salesmen, and showed it to him. He didn't know what to do with it, and the store's gunsmith was not there, so he couldn't take a look at it. (I was hoping it was some little thing the gunsmith could fix in five minutes.) So I decided to make this into a gunsmithing learning experience. I knew enough about Kel-Tec firearms already that I knew I would need some pin punches to get the P-ll apart. On the way home I stopped at WalMart and got a set of punches. They are made in China, imported via Mexico, and sold at WalMart. (Sounds about normal these days.) They seemed well made, and cost about $11.00. The 5/32" punch was the one I would need...

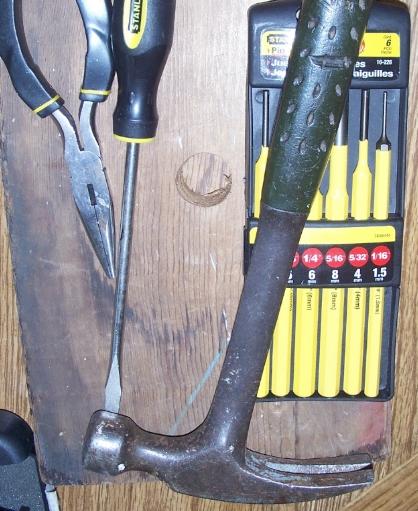
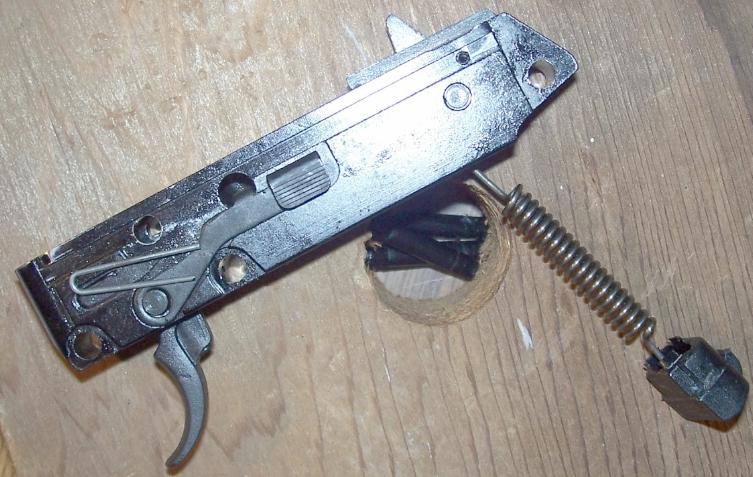
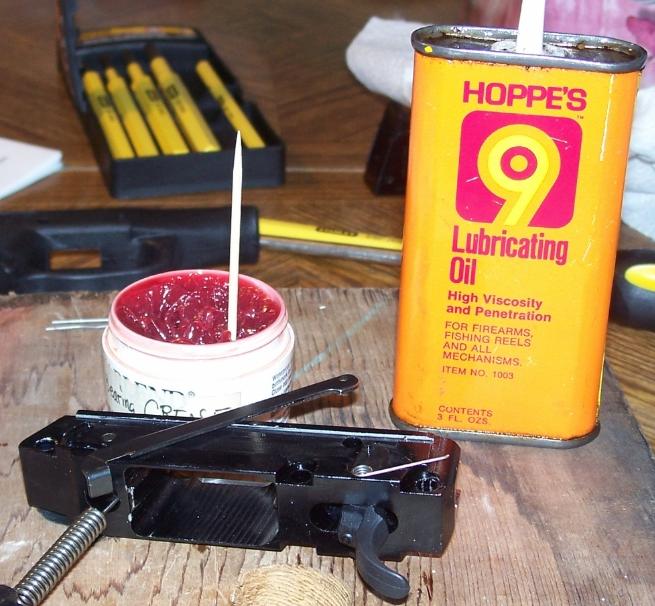
Before starting work, I Googled the internet (and searched the Kel-Tec Owners Group), and found a few web pages discussing the trigger spring, the trigger bar, and how to remove the frame from the grip. I knew I would also need a board with a hole in it, for the pins to fall into as I punched them out. So I grabbed a chunk of wood I had in my workshop, and drilled a one-inch-wide hole in it. Here's a photo of the tools I had to work with. I didn't need the pliers, but had it on hand just in case.
Punching out the three pins in the Kel-Tec P-11 was easy. Just some gentle tapping was all that was needed. The pins fell into hole, and stayed there the whole time I was working on the P-11.
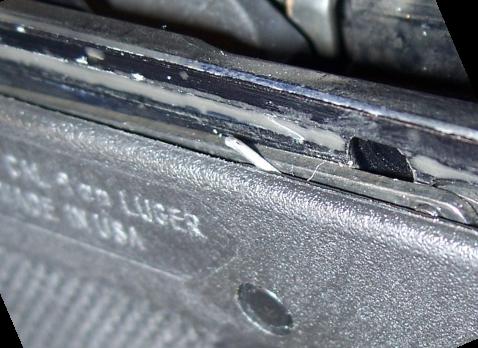
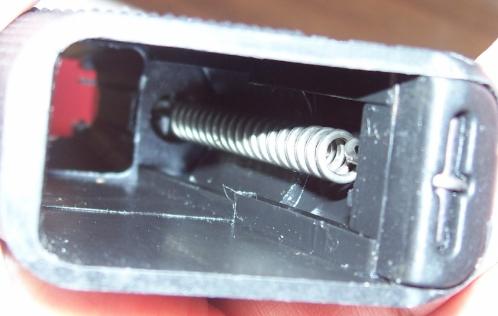
After punching out the pins, you must unhook the hammer spring from its attachment point in the bottom of the magwell. You do this by sticking a long flat-bladed screwdriver into the magwell, and pushing out the "anchor" that holds the spring. It takes a few muscles to do this, but it's not that hard to do. Here are two magwell photos, before and after removing the spring.
![]()
Now that the pins are out, and the hammer spring is released, all you have to do is lift out the aluminum frame that fits in the poly grip. It's a snug fit, but not tight. When you do this, hold down the slide stop spring (part # 284) with your thumb, to prevent it from coming loose suddenly and shooting across the room. It's small, and might be hard to find!
After I got the frame out of the grip, I removed the slide stop spring and set it aside, so it would fly off. I also got a piece of tape and put it over the hammer pin. (It's got a head on it like a little blunt nail.) It will easily fall out and set your hammer free, if you don't stop it from falling out. (Don't ask me how I know!) Turning the framework over, I could see that my trigger spring was not broken, but had simply slipped out of the very thin groove in the trigger bar, and was flopping about loose.
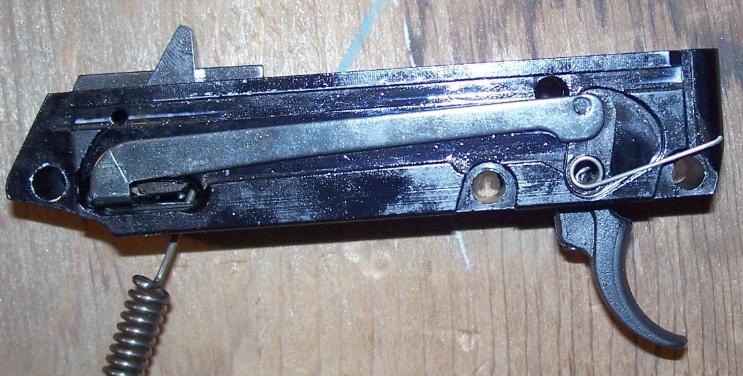
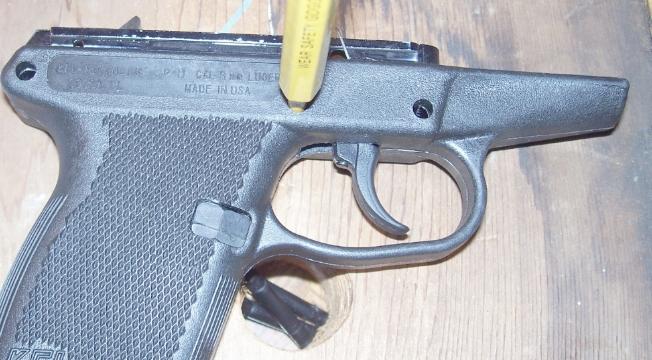
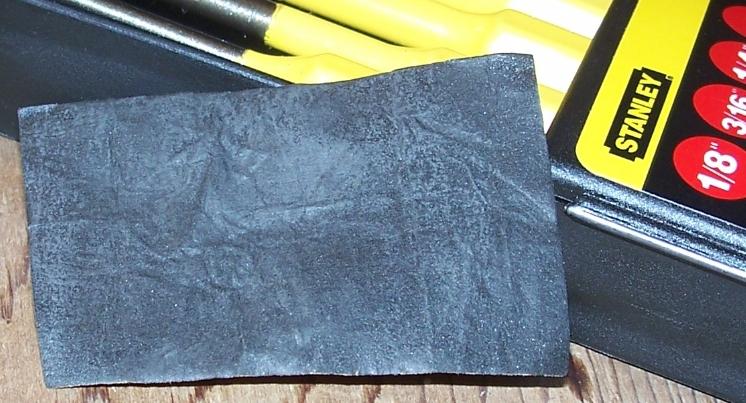
Can you see the groove in the photo below? The end of the trigger spring is supposed to be bent back counter-clock-wise, and the tip of the spring rides in this tiny groove in the trigger bar.
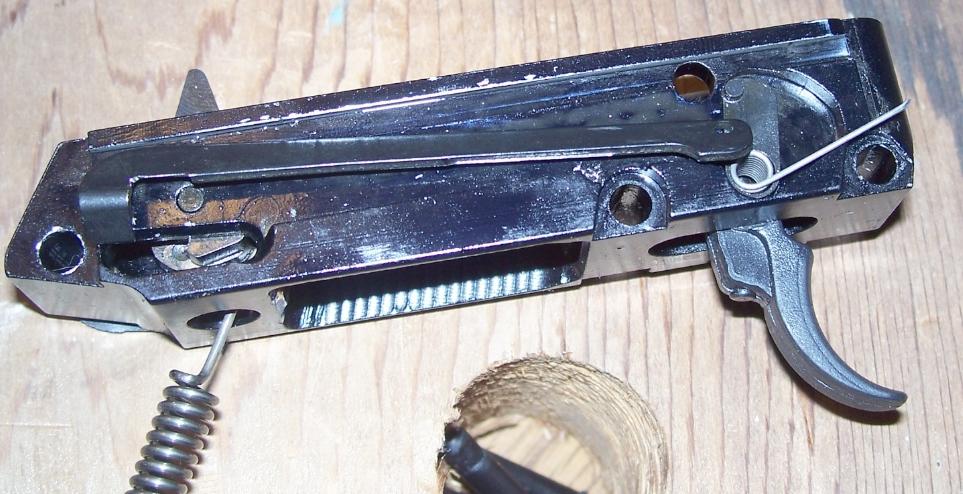
I took the trigger bar and with my thumbnail I cleaned out the groove. It seemed to have something caked in it that made it shallower than it ought to have been. I think I was able to deepen it just a little bit with my thumbnail (a great tool!) Then I took some #600 sandpaper, and polished the trigger bar a little bit.
I cleaned it the trigger bar and lubed it with some red wheel grease (automotive stuff). Then I put the trigger bar back in place, and moved the spring tip into the groove. It looked good to go.

I turned the aluminum frame back over, and set the take-down spring in its place. It has a nice little niche hollowed out for it, so it's quite easy to put it there where it belongs. Holding the spring in place with my thumb, I slipped the frame back into the polymer grip. It went in quite easily. Then I put the pins back in. I hammered them lightly until they were almost all the way in, then used the punch to make them fit flush. All that was left to do was to use the screwdriver again to stretch the hammer spring, and to set its anchor back in the place for it in the base of the magwell. I put a 9mm snapcap in a mag, and chambered it in the P-11. I then dry-fired the P-11 60 or 70 times (my finger got tired!). Everything seems to be back to normal, and I hope to go shooting very soon, and see if all will function properly at the range.
